分力センサのデータをとってみても、ポインターとしてどうなのか判断基準を持たないので、ポインティングデバイスとして実際にPCのマウス代わりに使いながら評価してみることにしました。
●Pro microで分力センサ出力をHIDマウスに変換
2018年8月に力覚マウスを開発したときにArduino pro micro のHIDマウス機能を使ってOKでした。
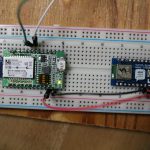
前回の基板は、HX711を2個搭載した2分力でしたが、今回は、FxFyFzの3分力センサなので、HX711を3個搭載したArduino pro micro基板を作りました。

裏面にpro microを載せました

中華pro microは、USBに難があってプログラム書き込み開始時のリセットをスイッチを押さないと書き込みができません。
ここのサイトで詳細に解説されてます。
https://ht-deko.com/arduino/promicro.html
●Arduino プログラム
事前にHX711とMouseライブラリをインポートしておきます。
ライブラリーを認識させるには、ボードの設定とポートの設定を済ませておかないとコンパイル通りませんので注意です。
ArduinoIDEの設定:
①ツールーボード=Pro-Pro micro かLeonardo
②ツールー書き込み装置=AVR ISP mkII
③シリアルポートでArduinoを認識させてそのポート指定
プログラム rev00なので未だ、バグだらけですが、HX711 3CHとHIDマウス接続方法だけの参考になります。
| #include <Mouse.h> #include <HX711.h> int Fx; int Fy; int Fz; int Fx_1; int Fy_1; int Fz_1; HX711 scale; HX711 scale2; HX711 scale3; //Variables double gainx=1; double gainz=1; int Fxr; int Fyr; int Fzr; void setup() { Serial.begin(38400); // initialize mouse control: Mouse.begin(); //HX711 initialize Sub Hx711_setup(); }void loop() { Fx_1=Fx; Fy_1=Fy; Fz_1=Fz; Fx=int(scale.get_units());//HX711 Fx read Fz=int(scale2.get_units());//HX711 Fz read Fy=int(scale3.get_units());//HX711 Fy read Fxr=abs(Fx)-abs(Fx_1);//相対座標X Fyr=abs(Fy)-abs(Fy_1);//相対座標Y Fzr=abs(Fz)-abs(Fz_1);//相対座標Y Serial.print(Fx); Serial.print(“,”); Serial.print(Fz); Serial.print(“,”); Serial.println(Fy); //Serial.print(“,”); //Serial.println(Fyr); if (abs(Fx)>3 || abs(Fy)>3) { Mouse.move(Fx*gainx,Fz*gainz,0); } } void Hx711_setup(){ Serial.println(“Initializing the scale”); // parameter “gain”is ommited; the default value 128 is used by the library // HX711.DOUT ? pin #A1 // HX711.PD_SCK ? pin #A0 scale.begin(A3, A2);//Fx scale2.begin(A1,A0);//Fz scale3.begin(A9,A8);//Fy Serial.println(“Before setting up the scale:”); Serial.print(“read: \t\t”); Serial.println(scale.read()); // print a raw reading from the ADC Serial.println(scale2.read()); // print a raw reading from the ADC Serial.println(scale3.read()); // print a raw reading from the ADC Serial.print(“read average: \t\t”); Serial.println(scale.read_average(20)); // print the average of 20 readings from the ADC Serial.print(“read average2: \t\t”); Serial.println(scale2.read_average(20)); // print the average of 20 readings from the ADC Serial.print(“get value: \t\t”); Serial.println(scale3.read_average(20)); // print the average of 20 readings from the ADC Serial.print(“get value: \t\t”); Serial.println(scale.get_value(5)); // print the average of 5 readings from the ADC minus the tare weight (not set yet) Serial.print(“get value: \t\t”); Serial.println(scale2.get_value(5)); // print the average of 5 readings from the ADC minus the tare weight (not set yet) Serial.print(“get units: \t\t”); Serial.println(scale3.get_value(5)); // print the average of 5 readings from the ADC minus the tare weight (not set yet) Serial.print(“get units: \t\t”); Serial.println(scale.get_units(5), 1); // print the average of 5 readings from the ADC minus tare weight (not set) divided Serial.print(“get units2: \t\t”); Serial.println(scale2.get_units(5), 1); // print the average of 5 readings from the ADC minus tare weight (not set) divided Serial.println(scale3.get_units(5), 1); // print the average of 5 readings from the ADC minus tare weight (not set) divided // by the SCALE parameter (not set yet) scale.set_scale(2280.f); // this value is obtained by calibrating the scale with known weights; see the README for details scale.tare(); // reset the scale to 0 scale2.set_scale(2280.f); // this value is obtained by calibrating the scale with known weights; see the README for details scale2.tare(); // reset the scale to 0 scale3.set_scale(2280.f); // this value is obtained by calibrating the scale with known weights; see the README for details scale3.tare(); // reset the scale to 0 Serial.println(“After setting up the scale:”); Serial.print(“read: \t\t”); Serial.println(scale.read()); // print a raw reading from the ADC Serial.print(“read2: \t\t”); Serial.println(scale2.read()); // print a raw reading from the ADC Serial.print(“read average: \t\t”); Serial.println(scale.read_average(20)); // print the average of 20 readings from the ADC Serial.print(“read average2: \t\t”); Serial.println(scale2.read_average(20)); // print the average of 20 readings from the ADC Serial.print(“get value: \t\t”); Serial.println(scale.get_value(5)); // print the average of 5 readings from the ADC minus the tare weight, set with tare() Serial.print(“get value2: \t\t”); Serial.println(scale2.get_value(5)); // print the average of 5 readings from the ADC minus the tare weight, set with tare() Serial.print(“get units: \t\t”); Serial.println(scale.get_units(5),1); // print the average of 5 readings from the ADC minus tare weight, divided // by the SCALE parameter set with set_scale //Serial.print(“get units2: \t\t”); Serial.println(scale2.get_units(5), 1); // print the average of 5 readings from the ADC minus tare weight, divided // by the SCALE parameter set with set_scale Serial.println(“Readings:”); } |
●手での動作試験
FxFzFy方向に力を加えたらそれなりに分力がでてました。
Fxのマイナス方向の時Fzのクロストークがでてましたが、これが力そのものが入力されているのかセンサのクロストークか解析しないといけませんので、後日校正が必要です。

Fxがカーソル左右、Fzは、上下だが、Fzは噛む方向しか力が加わらないので、戻らないのでここをどうするかでFyを活用してFzの±方向を変える方法を実験してみます。しかし、FxFzのレンジでは、Fzが大きな範囲でないとFxが動かないので動かしにくいと思っていたのですが、人間の制御能力が素晴らしくて、
「指で動かしたり力の加え方でカーソルが動くのでそれに合わせて、自分でカーソル制御できました。」
●気づいた課題
課題1:センサ値は一定値なのにカーソルドリフトする現象
=>プログラムデバッグして解析
課題2:Fz(噛む力)は一方向しか表現できないので、逆方向へカーソルを移動するために何らかの口の動作を追加しないとならない
Fzでだめなら、プラスマイナス両方向へ操作できる分力をMxMyMzからさがさないといけなくなる
課題3:歯と接触板との固定を強固にするために歯型をがっちり抑えこむ形状のToothピースを作る必要がある
=>形状を調査して設計して、3DPで造形する
課題4:今回の試作WS1は、大きくて口先で挟んで支えることができないため手を添えないと動作できません。WS2では、小型軽量化して口先だけで支えるタイプに改良していきます。


